Every byte tells a story, and every connection can unravel a mystery.
In this post we will be walking through setting up our digital forensic’s workstation, why we are choosing Windows and the “digital detective toolkit” we will be using.
Choosing the Right Hypervisor
Starting out, like most set up’s I try to segment my personal computer with any work related operating systems, and it’s overall just good practice not to mix the two. We will be using Parallels Desktop for Mac, but you can use virtual box or VMware if you are more comfortable with those platforms.
Most of the set-up outside the initial installation of our OS on the virtualization software should be the same.
Setting Up Windows for Digital Forensics
Why Windows? I love Linux / Unix operating systems as much as the next person but using Windows over a typical Linux setup for a digital forensics workstation is the better option due to the compatibility and availability of certain forensic tools. Zimmerman’s suite, Arsenal Image Mounter, and Event Log Explorer are designed primarily for Windows environments, and for tools we wouldn’t normally be able to run & general quality of life being able to navigate the directories without a GUI in a comfortable setting we will be installing Ubuntu on Windows Subsystem for Linux (WSL)
To install Windows on parallels we first need to get an image of Windows to do this we will be going to Microsoft evaluation center here you can get a variety of free Windows trial versions. The specific version we will be using is Windows Server 2019 VHD version, as it provides the best performance and the setup process for WSL is easier than with others.
https://www.microsoft.com/en-us/evalcenter/evaluate-windows-server-2019 (both ISO and VHD)
https://go.microsoft.com/fwlink/p?linkid=2195334 (direct download of VHD)
We will be using the VHD to skip some of the set-up and installation process
To use the VHD with parallels we will have to convert our VHD to an acceptable format with parallels this can be done fairly simply using the command line
/Applications/Parallels\ Desktop.app/Contents/MacOS/prl_convert /'Path to VHD' --no-src-check --no-reconfig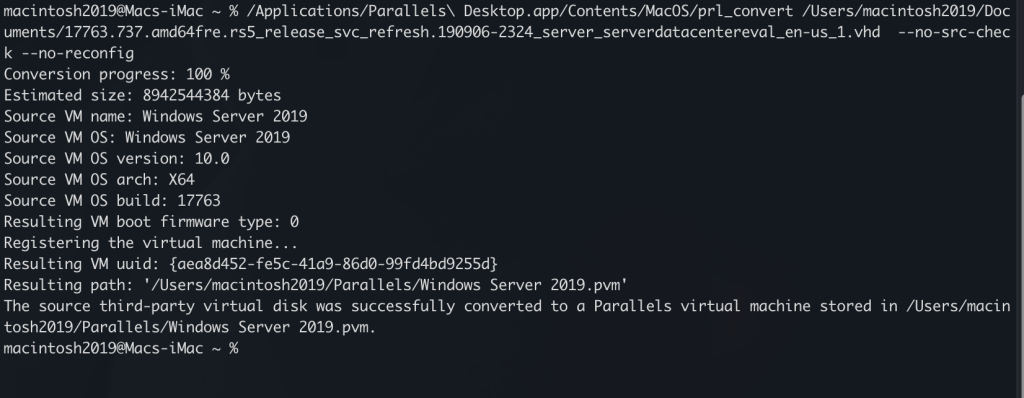
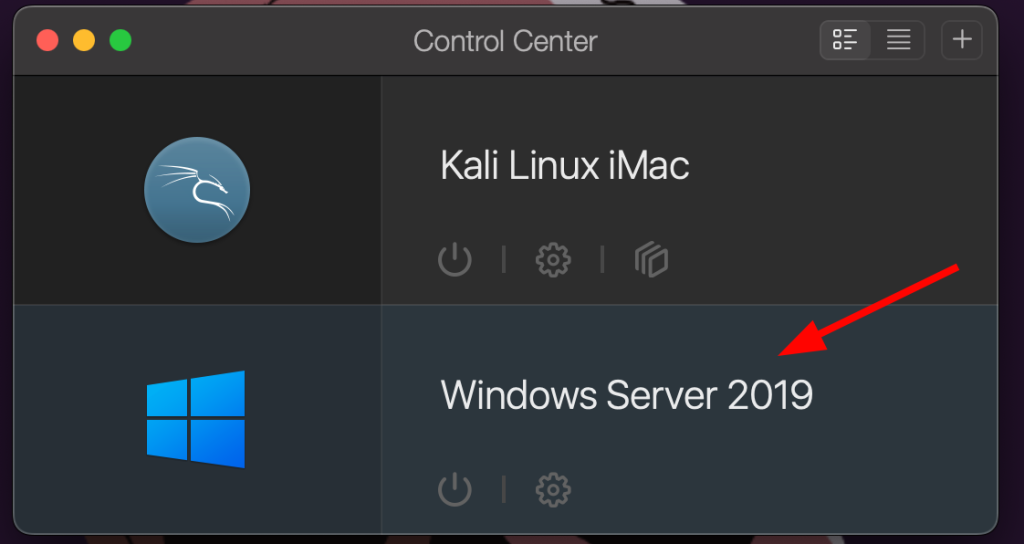
After it completes it should show up in your parallels control center
After opening our virtual machine we will be greeted with a set-up and couple of questions relating to location, terms and services and then an admin account set up.
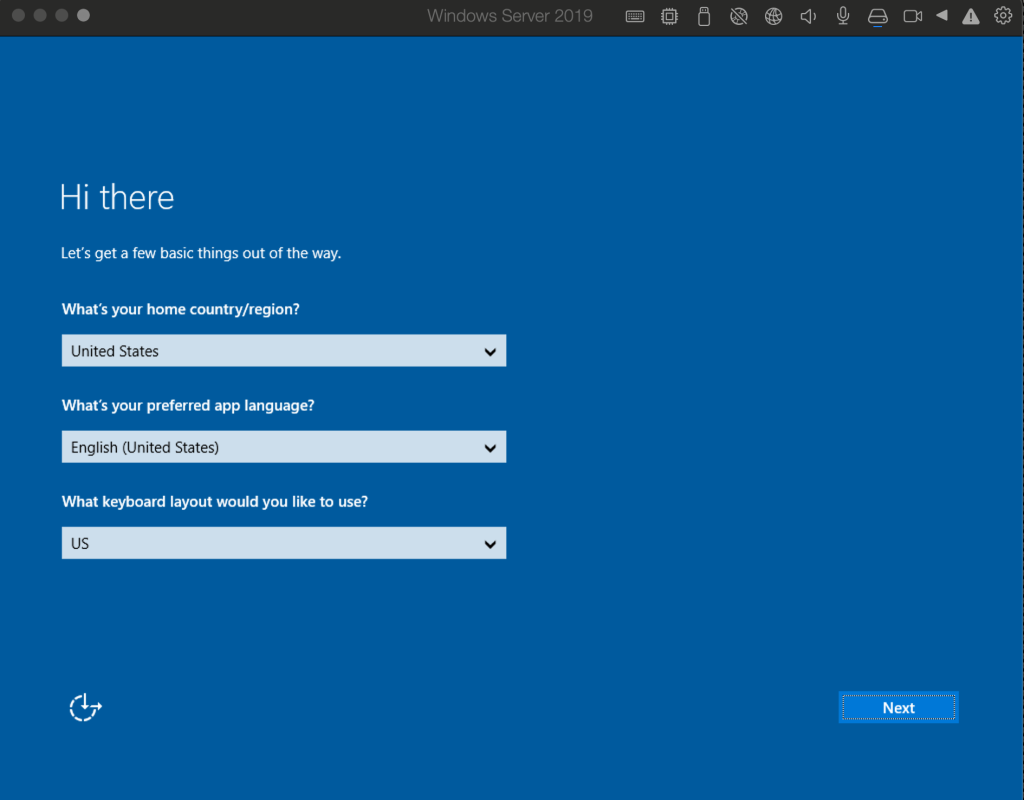
After this it should all be set up for us to be able to log into
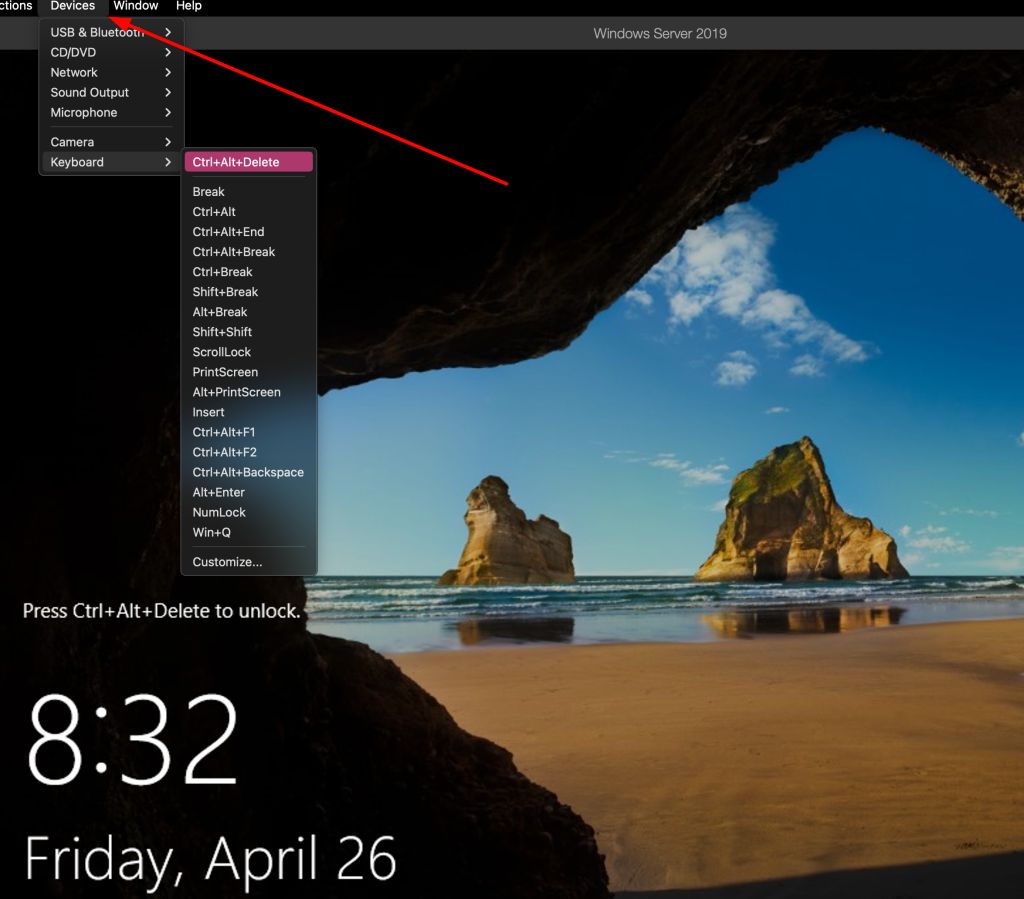
You cannot initially use the keyboard to unlock the machine, but this can be fixed by going to devices>keyboard>ctrl+alt+delete to unlock the machine and start using it
Configuring your Windows environment
- Set timezone to UTC: Best practice when it comes to forensic analysis and ensures consistent timezone with all tools
- Configure windows to show hidden files: Enables viewing relative but hidden file types Open File Explorer -> View -> check “Hidden items” and “File name extensions”.
- Create Folders: a “C:\Cases” and a “C:\Tools” folder for evidence data and tools.
- Configure Microsoft Defender: Avoiding interference with tools and evidence
- Open Virus & threat protection settings.
- Disable Defender’s “Real-time protection” when needed for a temporary period of time. If you want to permanently turn off real-time protection you need to disable it via GPO.
- Disable “Cloud-delivered protection” and “Automatic sample submission”, which only needs to be done once.
- Exclude your working directories e.g. “C:\Cases” and “C:\Tools” from Defender’s virus and threat protection scanning. That way Defender won’t detect and remove important files during an investigation. Go to “Exclusions” -> “Add an exclusion” -> “Folder
Enable Windows Subsystem for Linux (WSL)
We need to enable WSL. Start by opening PowerShell or command prompt as administrator and use the commands below to enable WSL
dism.exe /online /enable-feature /featurename:VirtualMachinePlatform /all /norestartdism.exe /online /enable-feature /featurename:Microsoft-Windows-Subsystem-Linux /allThen restart our machine
When the machine starts back up login and open up another shell as administrator to download our Linux distro of choice, I will be downloading Kali Linux
https://aka.ms/wsl-kali-linux-new
When downloaded, rename the package from .appxbundle to .zip and extract the archive
Install the x64.appx package contained within the archive using the following PowerShell command (as administrator)
Add-AppxPackage ./DistroLauncher-Appx_1.13.1.0_x64.appxThen restart your machine again
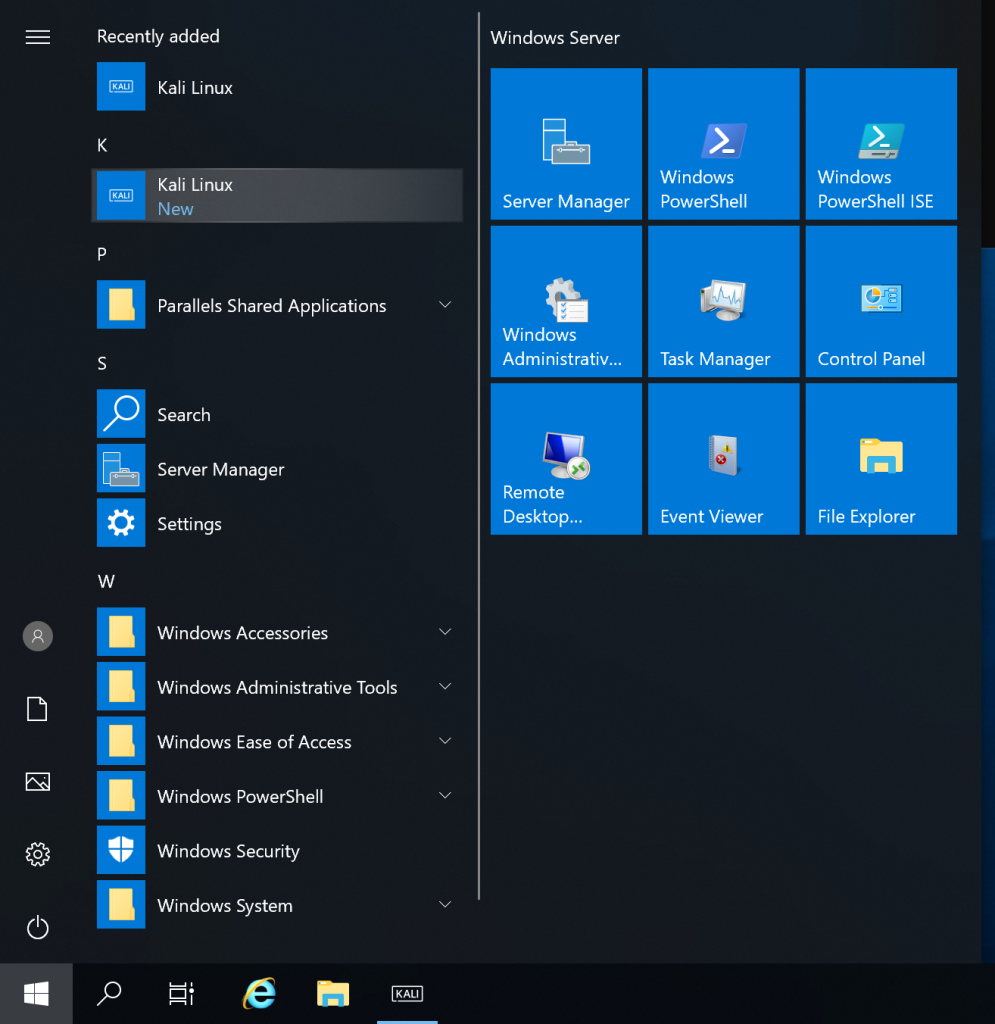
On restart open the start menu and select Kali Linux and set up your new user profile. Upon completion of that you will be greeted with your fresh new installation of Kali Linux

As always it is good practice to update and upgrade
sudo apt-get update && upgrade
Installing and Configuring Tools
For the tools we will be installing.
For windows
- EZ Tools from Eric Zimmerman: EZ’s tools are famous for Windows system analysis and are widely used in the forensics community. Recommended installing via PowerShell ‘
Get-ZimmermanTools‘ and ‘powershell -ExecutionPolicy bypass .\Get-ZimmermanTools.ps1‘ - RegRipper3.0: RegRipper is another well-known tool and provides a GUI-based as well as a command line-based tool for parsing all kinds of Registry hives.
- Event Log explorer: While Windows has an Event Viewer, Event Log Explorer provides a much more advanced user interface for parsing and analyzing Windows event logs through a GUI.
- Sysinternals: Windows Sysinternals suite provides a number of tools such as autoruns, process explorer, etc. that can also be very helpful for forensic analysis.
- Notepad ++: Go to text editor that supports syntax formatting for various types of text and code.
- Wireshark : Wireshark is widely known and used for capturing as well as analyzing network traffic.
- Arsenal Image Mounter: The most reliable tool when it comes to mounting disk images. Available for free.
- Kape: KAPE is a very flexible and effective tool for collecting triage data off of disk images. It also allows for directly parsing the data.
- FTK Imager: Another & most common tool for taking memory and disk images as well as loading and mounting images.
For Linux
- Python 3 and pip:
'sudo apt install python3‘ and ‘sudo apt install python3-pip‘ - Python2 and pip: ‘
sudo apt install python2‘ and ‘curl https://bootstrap.pypa.io/pip/2.7/get-pip.py –output get-pip.py’ and ‘sudo python2 get-pip.py‘ - Volatility 2 & 3: We are going to install both versions as Volatility 2 offers more plugins that have not been developed for Volatility 3 as of now, and they will come in handy in the future
git clone https://github.com/volatilityfoundation/volatility.gitOf course this isn’t every tool that you could install or end up needing for a forensic investigation, but this will allow you to analyze most of what could be thrown away if you ever need any other tools or new useful ones come out you can always just add them to your Windows machine / WSL
Thanks for reading.
Today we have set up a digital forensics workstation, we have curated a toolkit that not only takes the best out of Windows but also integrates the use of Linux through WSL. This hybrid setup ensures that we have whatever we could need to handle any challenges that future digital forensics scenarios present. As technology evolves, so will our toolkit, but this foundation will help you stay ahead.
There exist alternative options for workstations such as FlareVM from Mandiant, SIFT Workstation and REMnux further geared toward malware analysis that if you’d like to check out I have linked here
